There is no doubt that cameras like the RED ONE revolutionized independent filmmaking. Suddenly, micro-budget productions could produce films that had 4K, 5K, and even 6K resolution. This evolution of cameras and what they can do mean that it’s more important than ever for you, the filmmaker, to understand and create an effective post-production workflow.
To begin, one must understand that historically there are actually two stages in post-production, namely offline editing and online editing.
What is offline editing? In short, it’s the stage where your raw footage is run through a program that transcodes it to have a lower resolution. You can then use that lower resolution footage to edit your film. Think of this as the storytelling stage. The editor focuses on the timing of the cuts, the pacing of story, and communicating emotions.
Online editing, better thought of as the finishing stage, is where you’ll reconnect those low-resolution files to the original, full quality footage. This is also when color correction, effects work, final titles, and audio are brought into the film. It’s at the end of the online stage that you export your completed film.
To illustrate the need for two stages, take a look at this chart and notice the ‘processing power needed’ axis:
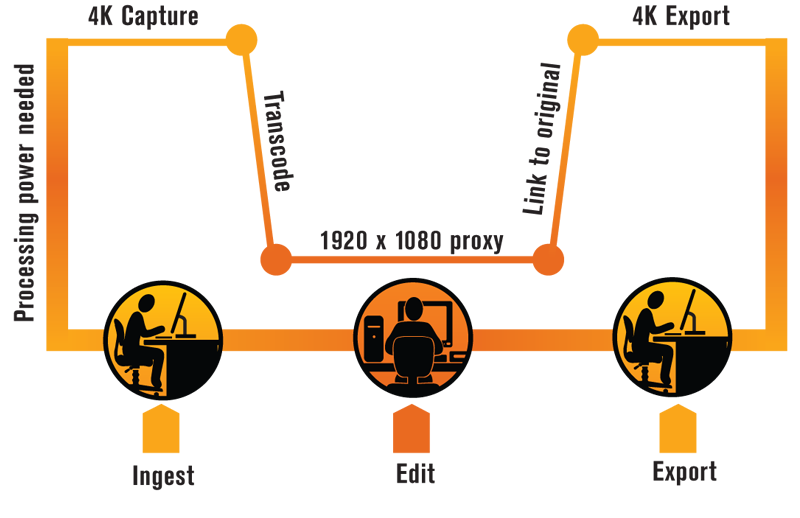
Wouldn’t it be faster to just edit the high-resolution footage? Programs like Premiere do claim you can edit natively, but the answer is in your question: 4K files are HUGE. 4096*2160 pixels, to be exact!.The speed at which an editor can work depends on their software (the editing system they’re using) and their system’s hardware (the actual computer they’re editing on).
So while programs like Premiere are able to edit several high-resolution tapeless formats natively, your editor’s system still needs to have powerful hardware. Every time a cut or change is made in the timeline, the computer’s CPU has to process the large files. If the hardware can’t keep up, the editor will have slow playback, the system could potentially crash and, worst of all, the footage could be damaged. Situations like that will absolutely slow down your editing process.
And please take a note from a post-coordinator: Always, always, always have at least one back-up hard drive of your footage… ALWAYS!
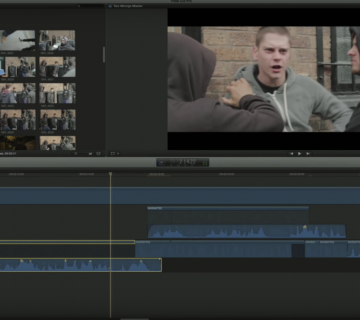
There’s also another place where you can lose time; when actually trying to view the rough cut. Often cuts of the in-process film will be uploaded to a dropbox account, google drive, privately on youtube or vimeo or even to an FTP. If your editor is working natively, in 4K resolution, they are going to have export a compressed (smaller) version of the film to upload. Exporting and compressing a 4K file is going to take more time than exporting and compressing a lower-resolution file.
So, you filmed footage; you’ve got those files on an external hard drive… What’s the first step in the offlining process?
To begin, a project will be made that brings in (imports) the full resolution files. This is a project that you won’t go back to until the offline process is complete.
The next step is to transcode. Simply put, that means turning (transcoding) the raw, high-resolution files into offline, low-resolution files.
Let’s be clear. When you transcode footage to have a lower resolution (in the above picture’s case, a 1920*1080 proxy file), you’re not changing the original quality of the footage. You’re making a lower quality copy that your editor’s system can easily edit. And in the case of 4K, you’ll still be working with high-definition footage.
When going through the offline process, I recommend transcoding your media into half the pixel size of your original media. So if you shot 4K, you’ll go to 1920*1080. I also recommend using the Pro Res 422 Proxy codec. Many sites will recommend using Pro Res 422 HQ, but I find that proxy is even easier on the system and the image quality between the two, in the offline stage, is negligible.
If you want to brush up on your knowledge of codecs before moving on, take a peek at this tutorial:
How do I transcode? That’ll depend on your footage and the editing software you’ll be using. Media Encoder is great when using Premiere, because they’re both in the Adobe family. Compressor could also be used for both Premiere and those that still edit in Final Cut. Another application, specific to RED footage, is REDrushes.
Once the lower-resolution footage has been made, it will be brought in (or imported) into a new offline project. That’s when the editor is free to work their magic.
Once the film is completed and, therefore, deemed locked, it’s time for the online process to begin.
The online process (also called the conform) means you’re taking the locked offline edit and reconnecting the used footage to its full-resolution parent. When using programs like Premiere and Final Cut, this starts by generating an EDL of the timeline.
An EDL is basically a reference file of your movie that your editor will open in the original project that contains the full resolution files. Once opened, the full resolution files connect and the timeline of your movie is now online.
But alas, we’re not done. Once the timeline of your movie is online, it’s time to color correct, do effects work and bring in the final audio mix. When all those elements come together, it’s time to export. And voilá, you’ve made a movie!
Remember: Creating a post-production workflow is about creating an environment where you and the editor can focus on your film. If this all seems like an unnecessary amount of effort and you just wanna get your masterpiece through post as quickly as possible, take a second with this countdown of some of the most effective editing moments in film history. It will make you appreciate the time and care needed in creating the optimal post-processing workflow.
And for good measure, here’s a clip from the film that won the 2014 Academy Award for Best Film Editing.


[…] the final part in that project. It is the final cut of whatever video that is being produced. Here you will combine the low-resolution files to the original, high resolution footage. This is where […]
[…] Offline and real time editing are two extremely different things when considering the actual process. Offline editing is when you have to work with large files and you have more time to actually go through the process of editing your work. Real time editing is commonly seen in things like sports, events, and music. You usually would not see real time editing when it comes to movies because, well, they’re movies. […]
[…] Understanding Post Workflow: Offline vs Online Editing […]