
For years I lived happily not knowing a single thing about color grading. Other – inarguably more talented – individuals knew all that stuff for me. I saw projects I had worked on go from looking good to feeling great after my work on it was already done, but I never thought much of it. Until I had to.
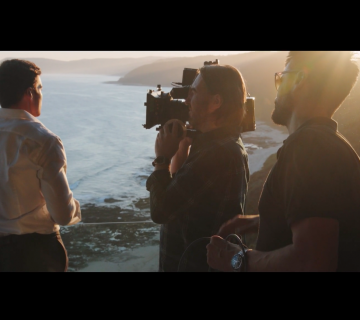
Quick backstory: I recently wrote and acted in a short film – one of those projects that are not gonna win a lot of awards, but are so valuable in keeping creative momentum going in between other projects. A passion project, if you will. We had a team in place, complete with editor and colorist. But as shooting wrapped and we moved into post-production, well, life happened. We’d lost our editor and colorist. Because this was an ultra-low budget passion project, I didn’t want neither myself or the producer to spend anymore money finishing the short, so I took it upon myself to get the whole thing over the finish line. And though the result may have been better with professional help, I’m incredibly happy about this turn of events. Because as the old saying (sort of) goes: What doesn’t kill your film, makes you smarter.
Learn as you go?
In most aspects of filmmaking I take an approach of equal measures academic diligence and reckless, creative abandon. Perhaps with just a pinch of luck and lots of Command-Z. As I was getting started on the coloring process, however, I quickly realized I needed a slightly different approach.
#1. Familiarize yourself with the tools. All of them.
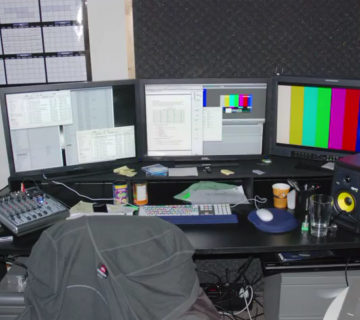
Before taking your very first look at an RGB Parade, know what it means and what it does. Same goes for waveform monitors, vectorscopes, the Ansel Adams Zone System, and so on and so forth. Don’t just know what you need to know about one of these tools. Know them all. Only then will you know where to look for help when your eyes are deceiving you.
#2. Understand light.
Your cinematographer will no doubt be doing her very best to light and shoot a scene in a way that will require the minimum amount of exposure correction or tinkering with shadows and highlights, but even so, you will need to adjust these things in post. To properly do so, you need to understand light. Shadows, midtones and highlights all affect the image in very different ways and each can be used to both balance a picture and set a mood.
#3. Understand color.
As with the shadows, midtones and highlights in your image, your reds, greens and blues all affect the look and balance in tremendously different ways. Together lighting and color is what makes your image what it is; cinematic, flat, emotional, cool, vibrant. So understand what it does to your image when you lower the reds in your highlights or increase the blues in your shadows.
#4. Respect the workflow.
The first mistake I made as I started the coloring process was to go directly for the end result. It’s the reckless, creative abandon in me. I knew what I wanted the image to look like, so obviously it would save me tons of time if I just went straight to the color wheel and started turning the knobs. I was wrong. Respect the workflow. Start with the necessary adjustments to exposure, fine-tune the dynamic range, balance the color and then match your shots. Only then – when you have a series of well-balanced and well-matched shots – can you start creating the look you want. If you go the other way around, you’ll spend way too much time fumbling around with colors and lighting, trying to match the shot that came before. Before you get creative, be scientific. Use the tools (#1) and your knowledge (#2 and #3) to first fix what needs fixing.
#5. Watch the tutorials. All of them.
Whether you’re about to start color grading your own film for the very first time or never have any intention of ever doing so, do yourself a favor and watch the tutorials. Even if you’re gonna leave the technical stuff to someone else, just knowing about the process, the tools and the challenges will make it so much easier when you’re trying to explain what you want the final picture to look like. If you’re gonna watch just one tutorial on the subject, Color Grading Central is a good place to begin. Here’s the first in a free series of 15 video tutorials (and one bonus tutorial) taking you through all the steps of color grading in Final Cut Pro X. The tools may differ slightly if you’re using Premiere Pro or DaVinci Resolve, but the fundamentals are the same.
Now, get creative.


Join the Conversation →