Oh, so you don’t have thousands of dollars to spend on nighttime lighting setups for your indie horror flick? Don’t fret. The Hollywood magicians have been using the same trick for decades: shooting ‘Day For Night.’ And you can too.
If you have never heard the term ‘Day For Night’ before, here’s an ultra-quick primer. One of the main luxuries afforded to you as a filmmaker when shooting during the daytime, the sun, literally disappears come nighttime, so shooting good-looking, non-grainy footage will suddenly require massive lighting setups to cast just enough light on your subjects and backgrounds to make them stand out clearly on camera without making it look like the scene has been lit at all. This is because cameras generally can’t shoot in the dark. What your eyes see at night is not what the camera is going to pick up – hence the unnatural lighting needed. To cut costs (and for many other reasons, like scheduling, location/talent availability, safety, etc.) filmmakers throughout the ages have resorted to the ‘Day For Night’ technique, wherein you shoot your nighttime scenes during the day while taking certain measures that will enable you to pass the footage off as genuine nighttime shots. Some is done in-camera, some is done in post.
Many articles have been written about how to achieve a good ‘Day For Night’ shot. Most focus on a few key parameters, such as avoiding harsh shadows, lowering your exposure, avoiding showing the sky in your shot, using polarizing filters and taking your sweet time in post-production. All valid points, but since you’ll find more than a handful good articles on these subjects elsewhere, we’ll gloss over them without going into too much detail. Instead, we’ll focus on a more mental aspect of the ‘Day For Night’ effect.
First, the classics:
#1 Avoid harsh shadows
To avoid hard shadows in your shot, which is a dead give-away that your scene was shot during the day, be sure to backlight your subjects and try, if you can, to shoot on cloudy days or in the shade. Moonlight casts some light, so it’s not necessary to avoid shadows all-together, but aim for a soft glow around your subject, rather than a long shadow on the ground behind it. Here’s a more in-depth look at different challenges with different, natural light conditions.
#2 Lower your exposure
There’s less light available to you (whether your camera or your eyes) during the night, so have your camera help you a bit on the way to achieving the ‘Day For Night’ effect by lowering your exposure. You definitely don’t want anything in your shot to be blown out or super bright, and you also don’t want to lose too much detail, so manually adjust your exposure to be just a little lower than you normally would have it. The rest you can take care of in post.
#3 Avoid the sky
If you don’t know anything about color-grading, using masks or key frames, you may want to completely avoid shooting the sky. A bright sky in your nighttime shot screams DAYTIME and there goes the suspension of disbelief out the window. That said, a night sky can be eerie or beautiful or set up your shot perfectly, so if you know how to effectively edit the sky in post, go ahead and shoot it. Just keep in mind that in moving shots or action with the sky as a backdrop is going to require a lot of careful editing later. If you can achieve the same results for your scene without having the sky in the shot, you’ll be off much easier.
#4 Use a polarizing filter
Think of the polarizer as a safety net. If you have to shoot against a surface with a glare, such as a body of water or a shiny building, the polarizer will help you avoid anything too shiny to remove in post. You can even leave it on your lense for the duration of the (‘Day For Night’) shoot and not even think twice about it. It’s not going to hurt your shots and it will help if you miss accounting for a shiny surface in your shot setup.
#5 Take your sweet time in post-production
Carefully adjusting your hue, saturation, colors, exposure and shadows will get you far, but it will be your attention to detail that will really sell the shot. Adding artificial light sources, like headlights, streetlights, the glow from a window, the speckle of lights from the windows in a high rise, and so on and so forth, will create the nighttime setting – more than turning of the blue’s and turning down the red’s will ever do. Post-production is where the technical magic is going to happen when you’re shooting ‘Day For Night’, so take your time.
More on the post-production process can be found in this tutorial by Video Copilot.
Which brings us to the point I really want to make:
#6 Tell the story right
As a filmmaker you’re first and foremost a storyteller, so don’t get hung up on technicalities like polarizers or blue hues in post, just to then forget about your most powerful tool of all: the power of suggestion. This is what will take your shot over the finish line. Let’s look at a couple of examples. Say your character is driving all night to meet his lover on a dock four hundred miles away, so they can skip off to a tropical island together. What will make the scene feel like night may be the quiet music on the radio, the coffee he’s drinking to stay awake and the empty road. Or say your character is running through the woods to escape a cloaked villain. Quick cuts to other creatures of the night, being disturbed by the chase, may sell the fact that it’s night: an owl, a critter, a fox, a couple of eyes caught in the glare of a flashlight. Or say you’re shooting an action movie – nothing says night more than night vision.
All this to say that you have more in your tool box than filters and color-grading. Use the power of story to help people believe that it’s nighttime.
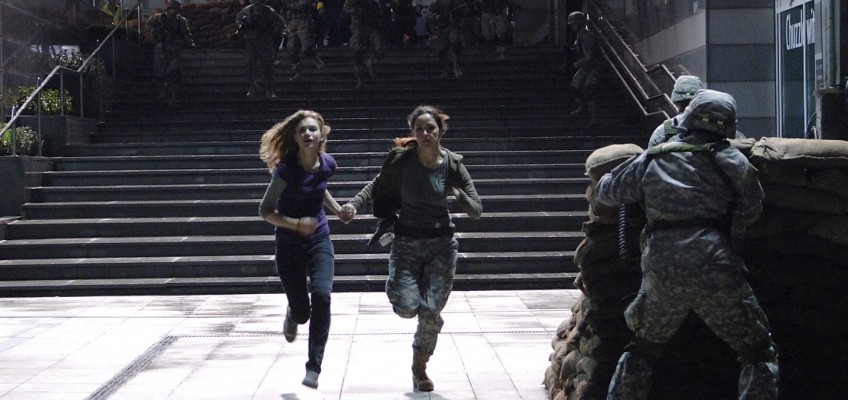
Need a good example of a movie that primarily shot ‘Day For Night’ scenes? Check out ’28 Weeks Later’ – because one of the film’s lead actors was too young to legally shoot through the night, most of his scenes were shot ‘Day For Night.’ And it looks perfect.




Join the Conversation →