When you’re shooting a low-budget film, chances are you will be making some concessions in post, as well. To make sure both principal photography and post-production make the most of what budget’s available, you want to think of the two production stages as a whole – and one way to do that, is to ‘shoot for the edit.’
Now, when you’re shooting for editing, you can do so to various degrees. A prime example that’s often brought up when shooting for editing is mentioned, is Robert Rodriguez’ El Mariachi. Hear the director explain how he planned his shots with the final edit in mind.
This is obviously taking it to the extremes. With digital cameras, laptop workstations and powerful editing software, your options are plentiful, even on a budget. So let’s take a look at how director and co-writer of The Storyteller, Joe Crump, approached the shoot – knowing that he would also be editing the footage. Here’s our conversation.
Why did you decide to edit the film yourself? Pros and cons to this approach?
In filmmaking, the story is told three times, 1. by the screenwriters, 2. by the director and 3. by the editors. I wanted to be involved in all three parts of this process. I also love to edit and my co-editor was my daughter, Katie Crump – who sat by my side and helped me craft the story.
So the pros of doing it myself is that it’s a hell of a lot of fun and I got to spend a lot of time with Katie. I also had help syncing the dailies from Nick Andrews, Saxony Wynecoop and Emelie Flower… which made our job a lot easier since they had to be done manually.
The cons – I couldn’t blame anyone else for my mistakes as a director or not getting coverage. I was told by several people that I should let someone else edit it – that I was too close to it – and I suppose that may turn out to be the case, but I don’t think it has. In fact, I think being close to it might have helped.
Knowing you would be editing yourself, how did you plan ahead? Did you organize the footage in a certain way?
We had a wonderful script supervisor, Michael Blomquist. He kept amazing notes and handed us a very detailed log when all was said and done. We also had a sound log that was very helpful from our sound mixer Bud Osborne. We kept all the camera file names so it was easy to cross reference.
After that, we kept track of everything by the day we shot it. We then created sequences that were about 5 minutes in length – we’d break them up by shot.
We then nested each of these sequences into one long master sequence. Using nested sequences speeds everything up and makes it much easier to find the shots you are looking for on your timeline.
We used an Alexa Mini and our camera original files were ProRes 4444, which won’t play on a PC – so we ended up making proxies to edit picture. While we were editing, (we used Premiere Pro CC), Adobe upgraded Premiere and now we can play the camera original on the PC – we still can’t open those files on a PC in Quicktime without hacking the metadata – and that caused the software to crash… you gotta love Apple and their proprietary codec.
Did the fact that you knew how you would be editing the film inspire any of your choices while shooting? Shot compositions? Long takes vs short takes? Blocking and actions?
Yes, absolutely. I spent a lot of time creating a shot list before I started directing. This is my first narrative feature film, so I had a good deal of fear and trepidation going into it – thinking that somehow, when I got on the set, everything would go to hell and I’d forget all the important things I needed to include or watch out for in the film. My shot list was 100 pages of notes, 100 pages of location pictures and diagrams and 90 pages of script. I broke up my shotlist into binders that we broke up by location. That way I wouldn’t have to carry all 300 pages, just the pages I needed for that particular location. Yes, this was probably overkill, but it makes things a lot more relaxing when you are prepared and it made it possible for me to work with my Director of Photography, Dan Clarke to come up with some additional shots that were better than I had planned on my own. As the shoot went on, my expectations of what our shots should look like and do got higher and higher. I didn’t just want to tell the story, I wanted to do it elegantly – and sometimes, you have to be there on the set to see something, an angle, a space, a camera move, the right angle of daylight… and take advantage of it when it appears. This takes a calm set and an fully engaged crew.
I was expecting to have a lot more emergencies than we ended up having. I was fortunate to have a great production team keeping things moving, headed up by our Producer, Rachel Noll.
We have a lot of live music in the movie, but we don’t just stay on people singing, we tell the story while the music is being played – so Rachel Noll (co-writer) and I designed a lot of the montage sequences around these songs. We freely played with time, location, memory – all that stuff during the songs. We also had to estimate how long it would take for certain images and sequences to play – how much screen time they would take – and I designed the shots so that we only had to shoot the parts of the song that we would actually show. I would like to have had more time to shoot more coverage, but it all ended up working pretty well when we got into the cut.
How did the intended use of visual effects in certain scenes affect how they were shot – and how does this play into how you are now editing those scenes?
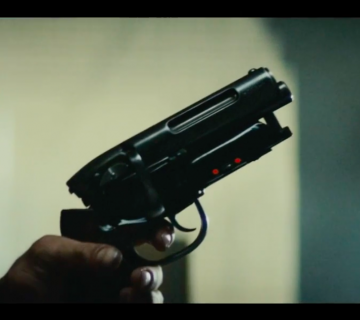
We tried to use practical effects whenever we could. Dan put an LED light on the end of a wand and we floated it into the scene for the fairy effect. Some of the shots we don’t have that effect and you can tell because the light being cast from the LED gives a wonderful look on any object or person near the fairy – when we didn’t use it (usually because of time constraints), we had to fake the glow on their faces in After Effects. That worked too, but it was time consuming in post and never looked quite as nice.
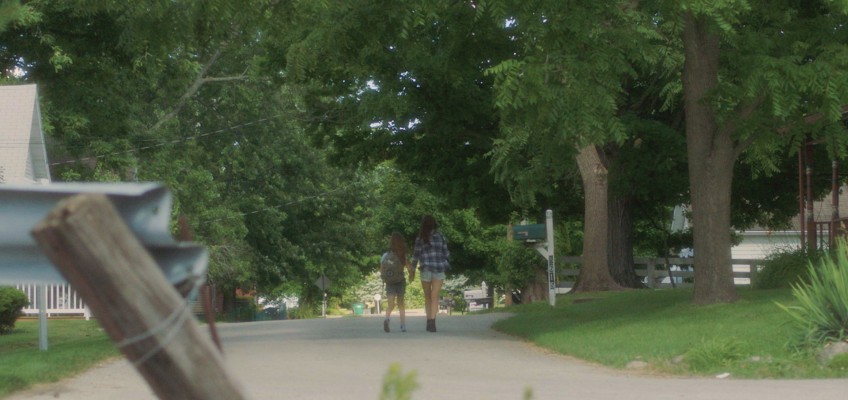
We also shot a lot of Day for Night. Our main actor was a 10 year old girl (Brooklyn Rae Silzer) and because we shot under SAG Ultra Low Budget rules, we had to limit the times and hours we could use her. Most of the work we did in the woods was day for night – same with the work we did outside on the Fairy Bridge. Dan Clarke, our DP, also did most of the VFX work on the film… some of the effects have 35 or 40 layers in 3D space.
35-40 layers of effects in 3D space is a far cry from the simplicity of the shots described by Robert Rodriguez in the video at the top, but both approaches share a common goal: Making the best film you can with the means available to you.
For more on shooting day-for-night, check out our article on the subject here. And if you would like to take a peek behind the scenes of The Storyteller and see how some of the VFX shots were created, here’s a video of an early visual FX test.

Join the Conversation →